This is a guest post written by Jenny Bayliss, author of our December Book Club pick Meet Me Under the Mistletoe.
Firstly, let me tell you how extraordinarily excited I am that my new book, Meet Me Under the Mistletoe, has been selected to be the Zoella Book club December pick. Honestly, it’s the fist gnawing, stomach tickling kind of excitement!
Although I have been writing for more than twenty years, I didn’t get my big break until I was 46, when my first book, The Twelve Dates of Christmas, was published. Meet Me Under the Mistletoe is my third adult novel and it still feels like a dream. I will never not be ecstatic and amazed to see something I’ve written out in the world.
I had a lot of other jobs while I waited for that big break but the one that I loved the best was working as a cake maker for a small coffee shop in my local high street. I adore baking and to be paid to bake cakes every day at the café with excellent friends and free coffee was pretty dreamy. I loved making up new recipes for each season and Christmas was my favourite time of all. It surprises absolutely no one who knows me that I write Christmas books for a living!
As we head into December, I’ll be getting in the festive spirit by baking a few of my all-time favourite recipes. Is there anything better than hunkering down with your favourite Christmas movie (or book for that matter) and a sweet treat?
Featuring chocolate orange shortbread, ginger biscuit tiffin, Christmas yo-yos and festive chocolate bark (great for gifting friends and family), save these recipes for the next time you’re in the mood to bake!
Chocolate Orange Shortbread

Shortbread and chocolate orange are Christmas staples, so what could be better than combining the two! All the buttery crumbly joy of rich shortbread, cut through with orange zest and dark chocolate chips make for a decadent treat which is surprisingly easy to make. It also makes a great homemade gift.
- Cut out a circle of baking paper to fit the base of your tin. Grease the base with butter, then stick the baking paper to it and grease the whole inside of the tin, making sure you get a good greasing in the fluted sides.
- Tip all the ingredients, apart from the chocolate chips, into a large bowl and rub lightly together between your fingertips until you have a clumpy breadcrumb texture.
- Then add the chocolate and mix through with your hands. The mixture will be very soft.
- Now you can pull it all together with your hands to make a soft dough. Don’t handle it too much.
- Transfer the dough to the tin and press it in with your hands so that it evenly covers the bottom of the tin and is pushed well into the sides. You can smooth the top out using the back of a dessert spoon.
- Prick the shortbread all over with a fork, cover and place in the fridge for 30 minutes.
- Pre-heat the oven to 160 degrees or 140 for fan.
- Place the shortbread in the middle of the oven and bake for 30 to 45 minutes or until it is a very pale golden brown. Then take it out and cover it liberally with a good sprinkling of caster sugar.
- After ten minutes, using a sharp knife, carefully cut your shortbread (still in the tin) into 8ths, then leave to cool completely.
- When cold, remove the shortbread from the tin by pushing the loose bottom of the tin up and out. You can half each piece again if you wish to make 16 bitesize pieces or leave as 8 large ones. Perfect with a cup of tea on a cold afternoon and freezes well if you want to get ahead or will last for a week in an airtight tin.
Ginger Biscuit Tiffin

Tiffin is a huge hit in my house and over the years I have made many different variations for birthday parties and celebrations. I made this one a few years back for Christmas and it went down so well that it is now part of my Christmas repertoire. This recipe can easily be made vegan by using vegan spread, chocolate and biscuits etc.
- Cut a large square of baking paper, big enough to hang over the sides of your tin. Grease the bottom and sides of the tin and push the baking paper into it. You don’t need to be overly neat, just so long as it is pressed in well and is flat.
- In a large bowl crush the ginger biscuits using the end of a rolling pin, until you have a mixture of biscuit sand and small pieces. Stir through the raisins.
- Place the baking spread, hot chocolate powder and golden syrup in a large saucepan and heat on a medium hob, stirring occasionally, until melted and glossy. Take off the heat.
- Tip the biscuit crumbs and raisins into the melted mixture and stir to coat completely.
- Turn the mixture into the lined tin and press it down firmly, making sure you get into the corners.
- In separate bowls melt the dark and white chocolate for the topping. If using a microwave, set it to medium and check and stir the chocolate every forty seconds until melted.
- Pour the dark chocolate over the tiffin base and smooth, then drop blobs of the white chocolate over the top and gently drag a fork through the two chocolates to make swirls. Sprinkle with decorations of your choice.
- Leave to set in the fridge for an hour, or until the topping is set.
- Using the overhanging parchment paper remove the tiffin from the tin and use a large knife to cut into 12 or 16 pieces.
- Will store in an airtight container in the fridge for 7-10 days.
Christmas Yo-Yos

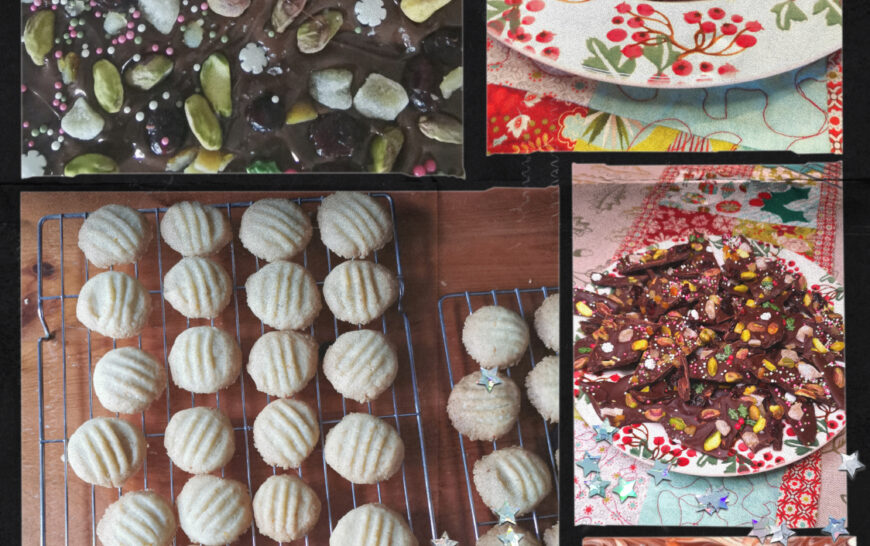
These little melt-in-the-mouth biscuits are surprisingly easy to make. I make these with a chocolate ganache filling but if you prefer something sweeter, you could make a buttercream instead. Or if time is tight, a ready-made chocolate frosting makes a speedy alternative. The yo-yos can be made ahead of time and frozen. (Makes 24).
- Start by making the ganache so that it has time to set.
- Break the chocolate into a heatproof bowl.
- Pour the cream into a small saucepan and gently heat on the hob until it comes to the boil.
- Pour the hot cream over the chocolate. Leave for a minute and then begin to stir the mixture until the chocolate has completely melted and you have a smooth glossy mixture. Add the 10g of butter and mix. Leave somewhere cool to set.
For the biscuits:
- Pre-heat oven to 180 degrees.
- Put all the ingredients into a food mixer/processor and mix on a low speed until the mixture is fully combined and comes together in a soft dough.
- Pinch off pieces of dough – about the size of a small walnut – and roll into 48 balls. Place the balls, evenly spaced, on the baking sheets. Lightly flatten each biscuit with the back of a fork which has been dipped in cold water.
- Bake for 12-15 minutes until the biscuits are a very pale golden. Leave the biscuits on the trays for 3-4 minutes to firm up and then carefully move them to a wire rack to cool.
- When the ganache has set, whip it with a wooden spoon to soften so that it is spreadable.
- Sandwich the biscuits together with the ganache and give them a good dusting with icing sugar.
- Will keep in an airtight container in the fridge for 5-7 days.
Festive Chocolate Bark

This looks gorgeous, tastes amazing and is so easy to make it’s almost rude. It makes a brilliant gift or a fabulous plate of deliciousness at a holiday gathering. It can easily be made vegan and gluten-free, just be sure to check your ingredients. There are no hard and fast measurements, you can load your bark as heavily or lightly as you fancy. You can choose whatever toppings you like to adorn your bark. I’ve gone for Christmassy flavours, but you do you.
- Melt the chocolate either in a bowl over a saucepan of simmering water or in the microwave on medium, checking and stirring regularly.
- Pour the melted chocolate onto the lined baking sheet and smooth it out, so that you have a layer about the thickness of a pound coin.
- Take small handfuls of your toppings and sprinkle them evenly over the chocolate. When you’ve loaded your bark, go over it with your fingertips pressing lightly on the fruits and nuts to make sure they are settled into the chocolate.
- Leave the bark to set completely before using a sharp knife to cut/break the bark into a mixture of large and small shards. Will keep in a cool place in an airtight container for up to two weeks.


