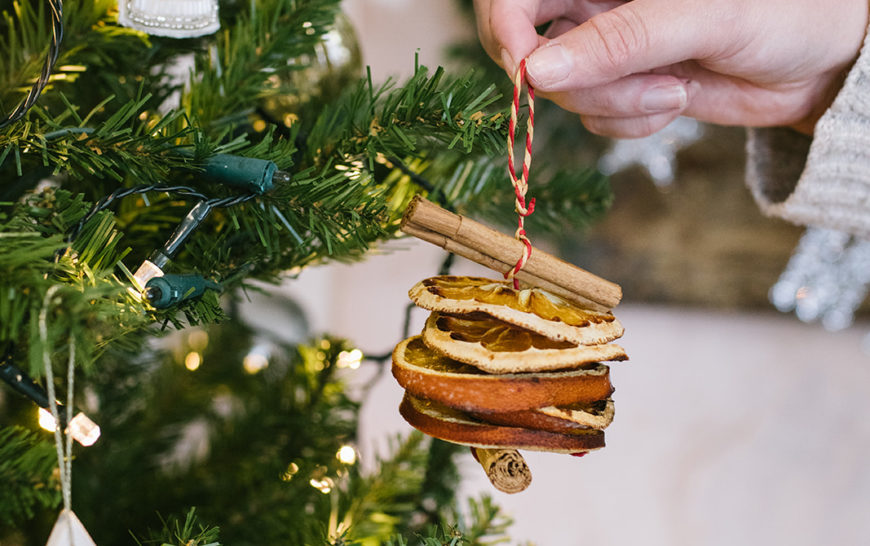


Traditional dried fruit decorations are the holy grail of Christmas crafts. Strung onto a garland, hooked into a natural Christmas wreath or even nestled into a bowl of potpourri, they bring a certain festive simplicity and fragrant flair to our homes throughout the holidays that no shiny modern & polished ornament would dare to compete with.

Losing yourself in this nostalgic craft for a few hours is a great way to switch off and get creative.
The chances are, you haven’t dabbled with the art of drying fruit since you were a wee nipper but losing yourself in this nostalgic craft for a few hours is a great way to switch off and get creative. Plus, your home will smell better than a Christingle service by the time you’re done and who could be mad about that?


You will need:
- Oranges
- Limes
- String / twine / Raffia for threading
- Baking tray
- Metal cooling rack
- Parchment paper
- Cinnamon sticks
- Paper towels / tea towel
- Upholstery needle
- Scissors
How to:
The first and most longwinded step is drying your fruit. Cut your oranges into 1-2cm thick slices and pat dry with paper towels or a tea towel to absorb the excess juice. Place your slices on a metal cooling rack over a baking tray lined with parchment paper to allow the air to circulate around the fruit and prevent them from burning.

Place them on low heat (120⁰C) in the oven for 3 hours and flip them over half way through drying. If you’re drying whole oranges, cut six ¼ inch slices around the orange and heat as per the sliced fruit but account for longer drying times (4-6 hours).

Once the fruit is visibly dry, remove from the oven and allow to cool before proceeding. You can create all kinds of dried fruit arrangements from present-toppers to place cards but here’s how to make traditional tree decorations & garlands.

Christmas tree decorations
Tie a knot in your twine or raffia, you may need to tie a few knots until it feels secure. Next, thread your dried fruit and cinnamon sticks onto your twine / raffia vertically to make a little stack. You will need to make small holes in your fruit to enable the needle to pass through.


When you’re done, tie another knot at the other end and create a loop to hang. For single fruit decorations, simply take an inexpensive Christmas tree hook/wire ornament hook and poke a hole around the rind. Pinch it closed and you’re done. If you’re attaching your dried fruit pieces to a wreath, use floristry wire rather than glue so you can reuse them for several years.

Christmas Garland
If you’re making a garland, thread your first piece of fruit from the back of your piece of fruit at a 1 o clock position, leaving a 12-inch tail of thread the other side. Then, thread back through the front of the fruit at an 11 ‘O clock position.
Take another piece of fruit. Poke a hole from behind at the 1 o’clock position again. Pull it all the way through next to the first piece of fruit to keep it taut. Take the thread out at 11 o’clock position again. Continue adding your fruit like this until you’re happy with how it looks.
After you’ve placed the last piece of fruit onto the garland, leave another 12-inch tail of thread at the other end for hanging, as you did at the beginning. Shuffle your fruit along the twine if they look too huddled together, then take the leftover string at the end, double it up to make a loop and make a knot a couple of inches down. Do this on both ends so you can hang your garland on the mantelpiece. Cut off the excess string and voila!